TouchMod Manual
Setup and usage guide for TouchMod IN, TouchMod FX and TouchMod Remote

System Requirements and Installation
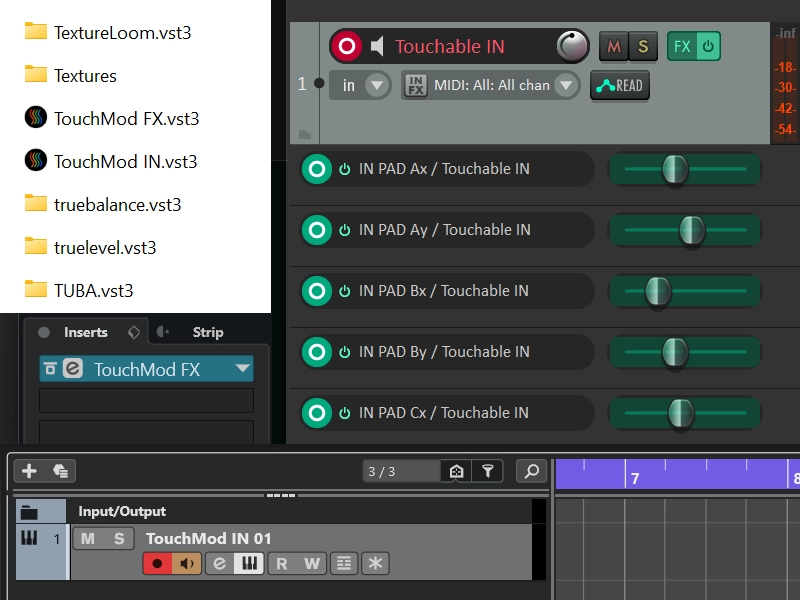
TouchMod IN and TouchMod FX are 64-bit VST3® plugins for Windows. You need a 64-bit DAW that supports VST3 plugins. TouchMod IN loads VST3 instruments, while TouchMod FX loads VST3 effects.
You can control TouchMod in three ways:
- A multitouch display connected to your Windows computer
- An iPad running the free TouchMod Remote app
- A mouse for setup tasks, parameter assignment and detailed adjustments
A mouse can be used to configure TouchMod, but a multitouch display or iPad is needed to control several touch points independently.
Installation
- Download the TouchMod ZIP file.
- Extract the contents of the ZIP file.
- Copy or drag the
.vst3file into the standard Windows VST3 folder:C:\Program Files\Common Files\VST3 - Restart your DAW or run its VST3 rescan if TouchMod does not appear immediately.
Loading TouchMod in your DAW
Load TouchMod IN on an instrument track. Load TouchMod FX as an insert effect on an audio track, instrument track, group channel or another channel that supports audio effects.
Run a Full Plugin Scan
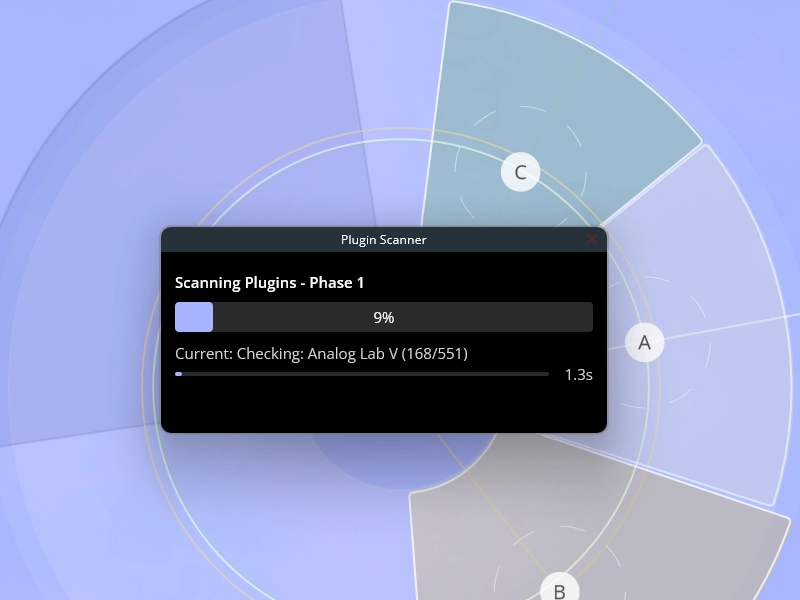
Run a full VST3 scan before loading instruments or effects in TouchMod. The scan creates a database of your installed plugins and the parameters they make available to the host. TouchMod also checks whether each plugin can be loaded reliably.
To start the scan:
- Open Settings with the gear icon.
- Scroll to the bottom of the Settings window.
- Click Scan/Re-scan all VST3 plugins.
- Leave TouchMod open until the scan is complete.
The required time depends on your computer and the number of installed plugins. As a rough indication, a collection of 100 plugins may take around 10 minutes to scan. Large plugins or plugins that take longer to initialize can increase the total time.
TouchMod displays the current progress while the scan is running. You can run the scan again after installing or removing VST3 plugins.
Load Your First VST3 Plugin
TouchMod can load two plugins at the same time, but it is easier to begin with one.
To load a plugin:
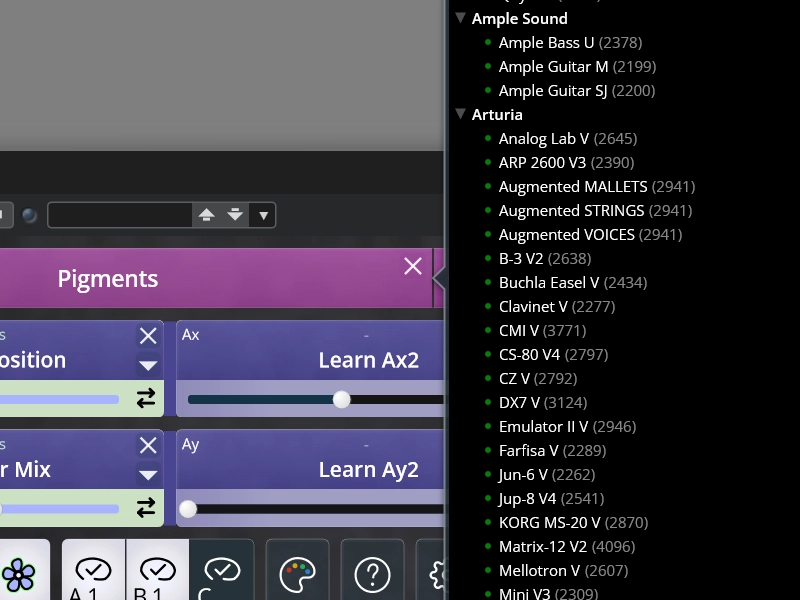
- Click one of the two large plugin selectors at the top of the TouchMod window.
- Find the instrument or effect you want to use.
- Click its name to load it.
You can sort the list alphabetically or by manufacturer. TouchMod FX can also sort effects by category. Use Recently Used to return to plugins you have loaded before, or type part of a plugin name into the search field.
Click the eye icon beside a loaded plugin to open or close its interface. Click the X icon in the plugin selector to remove the plugin from TouchMod.
TouchMod IN can load two instruments. TouchMod FX can load two effects. One TouchMod instance cannot combine an instrument with an effect.
Load Plugins Internally or in a Sandbox
TouchMod loads plugins internally by default. Internal loading provides the lowest latency and is normally the best option for plugins that run reliably.
If a plugin is unstable, you can load it in a Sandbox. Sandbox mode runs the plugin in a separate process. If that plugin crashes, it is less likely to close the DAW with it.
To load a plugin in a Sandbox:
- Remove the plugin if it is already loaded.
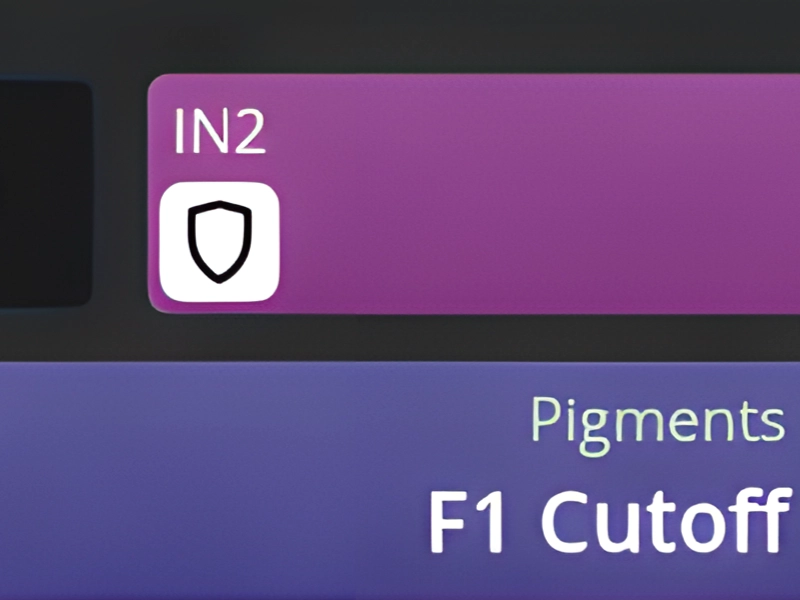
- Enable the shield icon on the left side of the relevant plugin selector.
- Open the plugin list and load the plugin again.
Sandbox mode adds some latency because audio has to pass between separate processes. Open Settings and adjust Sandbox Buffer Slots to find a suitable balance between stability and response time. Use the lowest value at which the plugin runs reliably.
The A, B and C Sectors
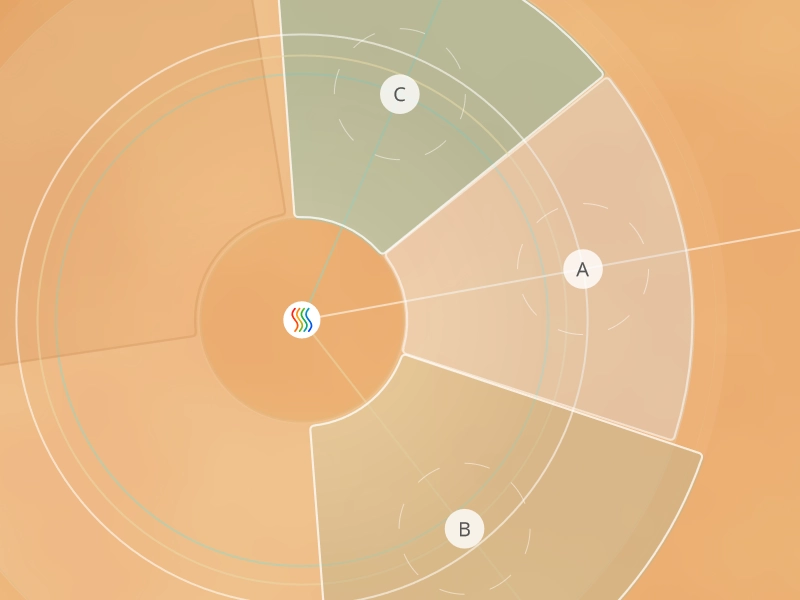
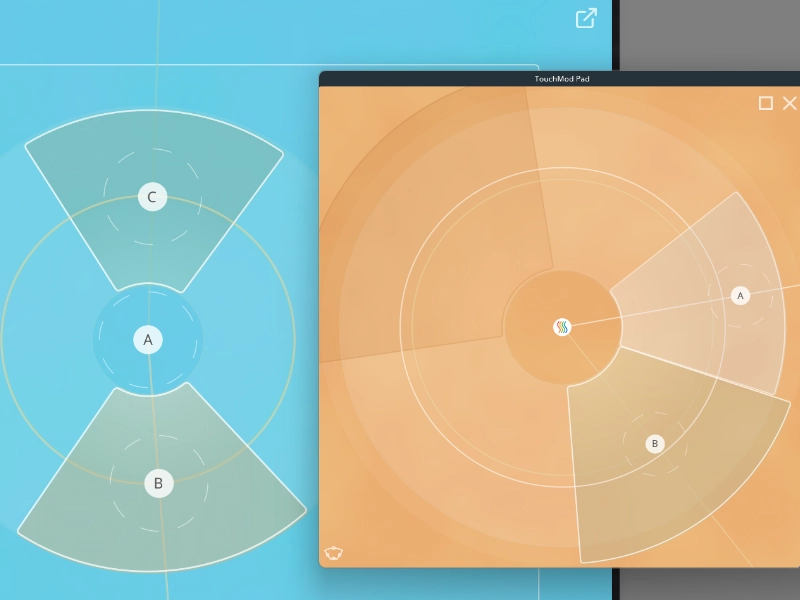
The A, B and C sectors are the main touch areas used to control plugin parameters. A common finger position is:
- Sector A: index finger
- Sector B: thumb
- Sector C: middle finger
This is only a starting point. You can use any finger arrangement that feels comfortable.
Each sector contains an X-axis and a Y-axis. One parameter can be assigned to each axis, so every sector can control two parameters at the same time. With sectors A, B and C active, you can control up to six parameters. Sector D can add two more.
In curved sectors, the X-axis follows the curve in a tangential direction. The Y-axis moves inward and outward in a radial direction. The exact behavior of B and C also depends on whether Butterfly or Flower mode is selected.
Assign Parameters
You can assign parameters through Learn mode or select them directly from the full parameter list.
Assign a parameter with Learn mode
- Click the parameter button for the axis you want to use.
- The button starts flashing and displays Learning...
- Move the required knob, slider or other control in the loaded plugin.
- TouchMod detects the parameter and assigns it to the selected axis.
When two plugins are loaded, each axis can control a parameter from either plugin.
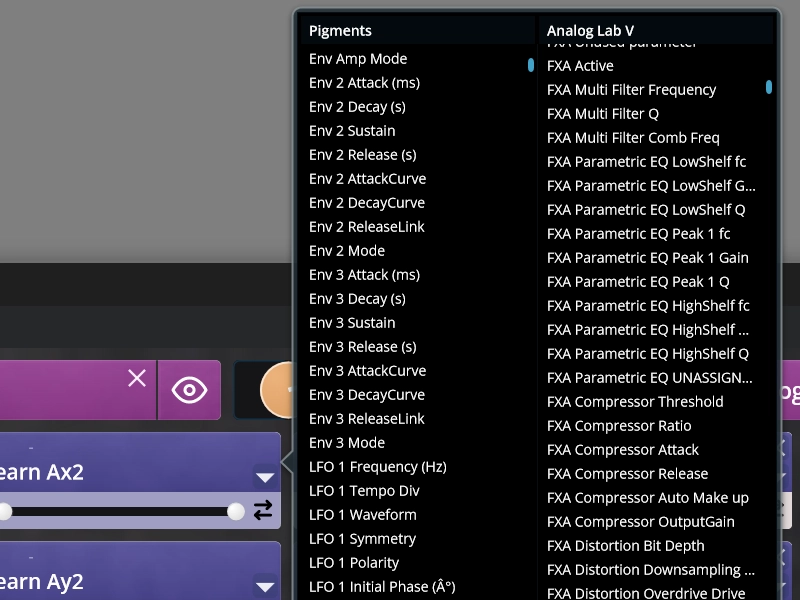
Select a parameter from the list
- Click the arrow on the relevant parameter button.
- Choose the first or second loaded plugin.
- Select the required parameter from the list.
The list may include parameters that are not visible on the main plugin interface. These can include controls found on other pages or parameters that the plugin makes available only to the host.
TouchMod communicates directly with VST3 parameters. No MIDI CC mapping is required for normal plugin parameter control.
Set and Invert the Parameter Range
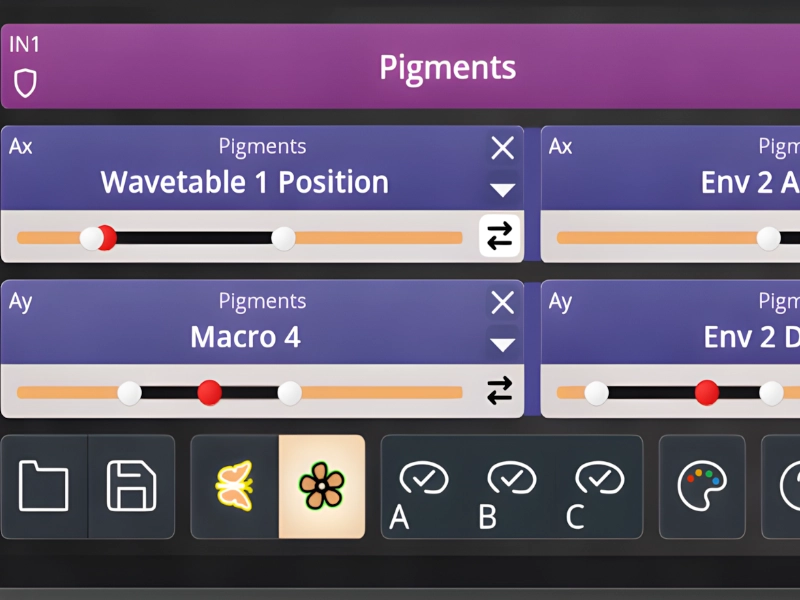
The range slider below each parameter button defines the lowest and highest value that the assigned parameter can reach from the pad. Limiting the range makes it easier to perform small or controlled changes.
Drag the left and right ends of the range control to set the minimum and maximum values. The red dot shows the current parameter value.
Click or drag within the range slider to hear how the parameter behaves between the selected minimum and maximum. Adjust the range until the full movement produces the amount of change you need.
Click the double-arrow button to the right of the slider to reverse the response. After inversion, moving in the opposite direction produces the higher value.
Two Pad Modes: Butterfly and Flower
TouchMod provides two pad layouts. Each layout is intended for a different balance between precision and equal access to several parameter groups.
Butterfly mode
Use Butterfly when the two parameters in sector A need the most space and precision. Sector A behaves like a conventional XY pad. Sectors B and C respond to the positions of your other fingers in relation to finger A.
Start by assigning parameters to the Y-axes of sectors B and C. Changes in the distance between your fingers are usually easy to control. The X-axes respond to movement around sector A and may require more practice.
Flower mode
Use Flower when the parameters in sectors A, B and C are equally important. The sectors have a more balanced size and each finger can move more independently. Flower is also generally easier to use when sector D is active.
You cannot switch between Butterfly and Flower while loops are running. Stop every active loop before changing the pad mode.
Use Sector D
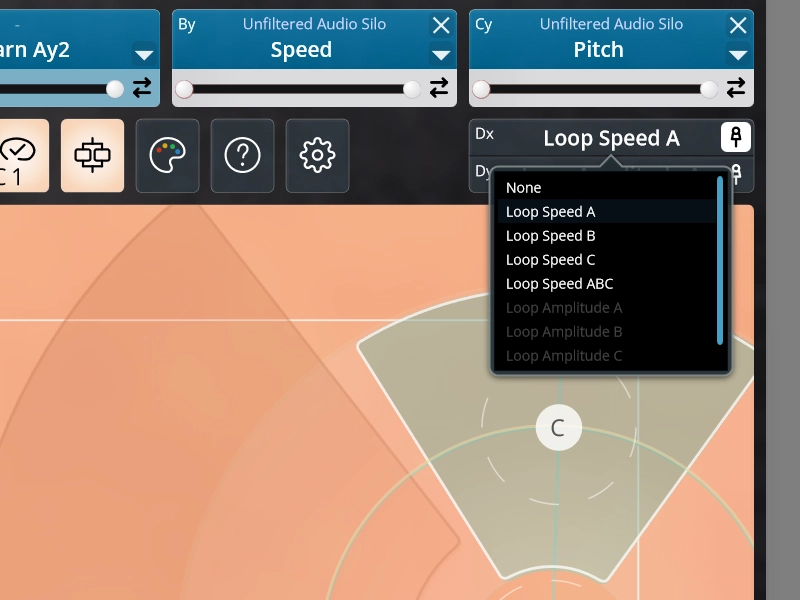
Sector D is normally controlled with the little finger. Unlike sectors A, B and C, it is designed mainly for continuous adjustments that should remain available while the other fingers control plugin parameters.
Its main use is controlling the speed and amplitude of recorded loops. These functions are explained in the Loop Learning section.
In TouchMod IN, sector D can also control pitch, the modulation wheel and selected MIDI CC values when the loaded instrument supports them.
Absolute mode
In absolute mode, the value follows the position where you touch sector D. Touching a different position immediately moves the value to the corresponding point.
Relative mode
In relative mode, the value remains where you leave it when you lift your finger. A new movement continues from the current value instead of jumping to the position where you touch the sector again.
Use the pin button beside the Dx or Dy control to enable relative mode for that axis. Absolute mode often works well for controls where position should match value. Relative mode can be more comfortable for adjustments such as loop speed or amplitude.
Use the Pad on an External Touchscreen
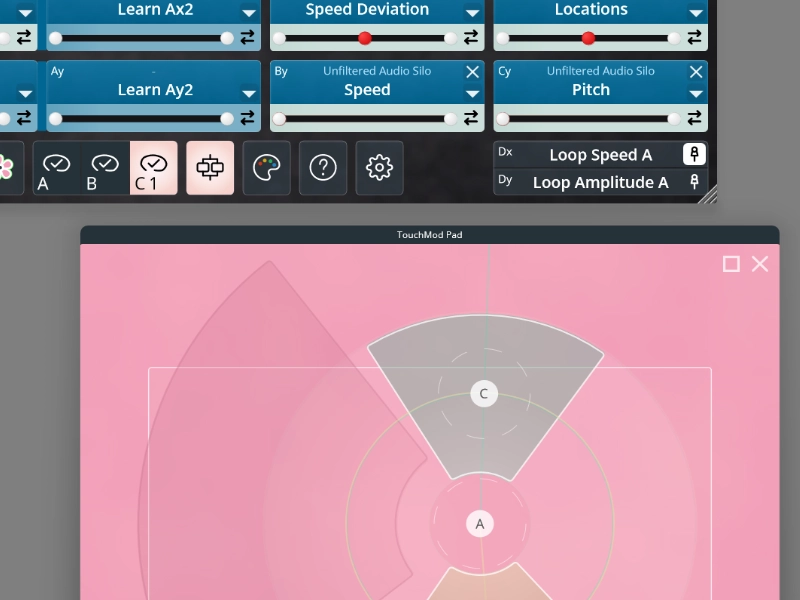
A multitouch display connected directly to your Windows computer provides responsive control with very low latency. Keep the main TouchMod window and loaded plugin interfaces on your regular monitor, while the pad remains on a separate screen within reach.
To move the pad to another display:
- Click Detach in the top-right corner of the pad.
- Move the detached window to the multitouch display.
- Maximize the window if you want to use the full screen.
To return the pad to the main TouchMod window, click the X button on the detached pad. Closing the detached window does not close the TouchMod plugin.
Use TouchMod with an iPad
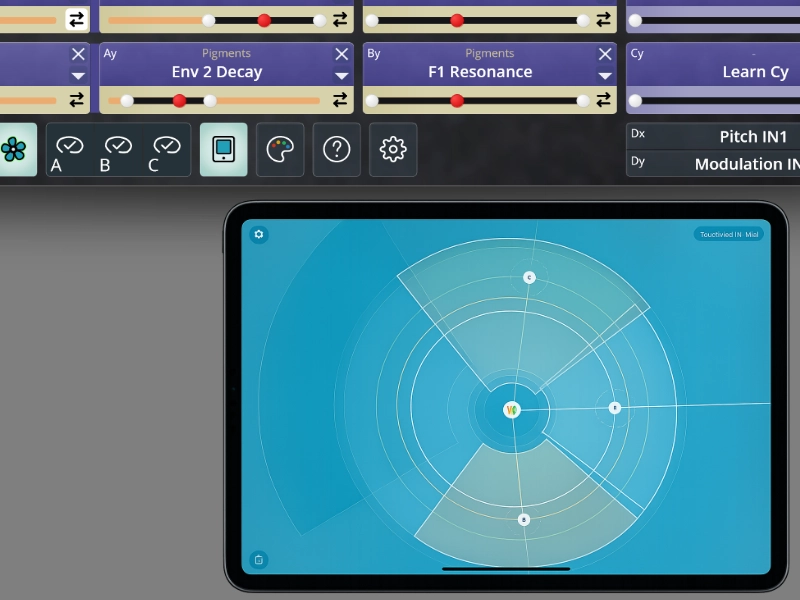
The free TouchMod Remote app turns an iPad into a wireless control surface for TouchMod IN and TouchMod FX. The app displays the active pad, sector layout and assigned parameters.
Plugin selection, parameter assignment, range settings and other detailed configuration remain in the TouchMod plugin inside your DAW. TouchMod Remote is designed mainly for playing and controlling the pad.
When several TouchMod instances are active, the iPad displays one instance at a time. You can select the active instance from TouchMod on the computer or from the iPad.
Assigning a different background color to each instance makes them easier to recognize when switching between several instruments or effects.
Connect TouchMod Remote
The computer and iPad must be connected to the same local network. The computer can use Ethernet while the iPad uses Wi-Fi, provided both connections belong to the same router or local network.
Connect the app
- Load TouchMod IN or TouchMod FX in your DAW.
- Open TouchMod Remote on the iPad.
- Allow the app to find devices on the local network. This request normally appears the first time the app is opened.
- Wait while TouchMod Remote searches for active TouchMod instances.
- Select the instance you want to control.
You can change the displayed instance from either the iPad or the TouchMod plugin. TouchMod Remote communicates entirely over the local network. Internet access is only needed to download the app and install updates.
If no TouchMod instance appears
Check the following:
- The computer and iPad are connected to the same local network
- The iPad is not connected to an isolated guest network
- Windows has permission to let TouchMod communicate on private networks
- TouchMod IN or TouchMod FX is currently loaded in the DAW
If a newly opened instance does not appear, close and reopen TouchMod Remote.
Adjust the Sectors to Your Hand
You can change the size and position of the touch sectors to suit your hand and the gestures you want to perform.
Show the adjustment handles
Use either of these methods:
- Click the currently active Butterfly or Flower button again
- Click the sector adjustment icon in the bottom-left corner of the pad
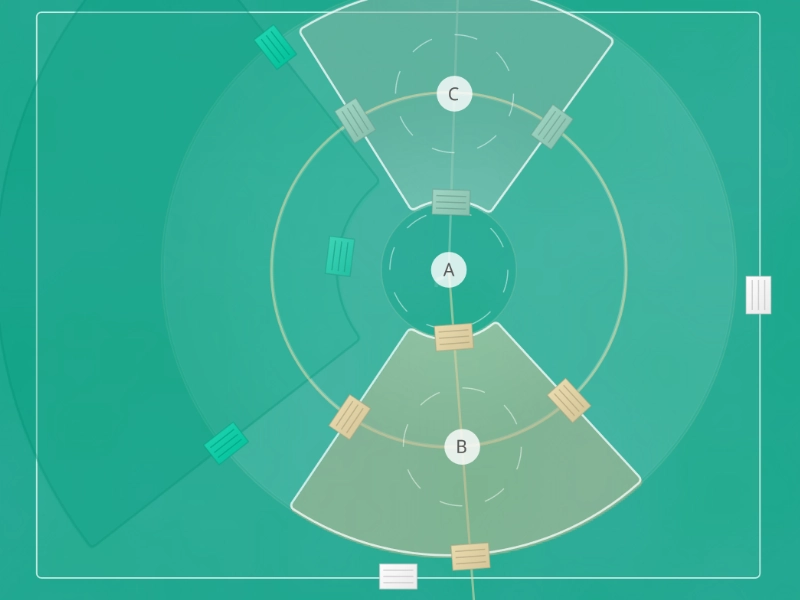
Drag the handles to resize the sectors and fine-tune their positions.
In Butterfly mode, you can also resize the central area used by sector A. This area is called the sheet. Leave enough space around the sheet for the fingers controlling sectors B and C.
Test the layout with all the fingers you plan to use. Small changes in sector size or position can make movements easier to repeat.
Loop Learning: Record One or Two Loops
Loop Learning records a repeated finger movement and continues playing it as a loop. Each of the A, B and C sectors has a three-state Loop Learning button:
- Off
- One loop
- Two loops
Loop Learning 1
Select the one-loop state for the required sector. Move your finger repeatedly through the movement you want to record. Keep the timing and shape reasonably consistent while TouchMod analyzes the gesture.
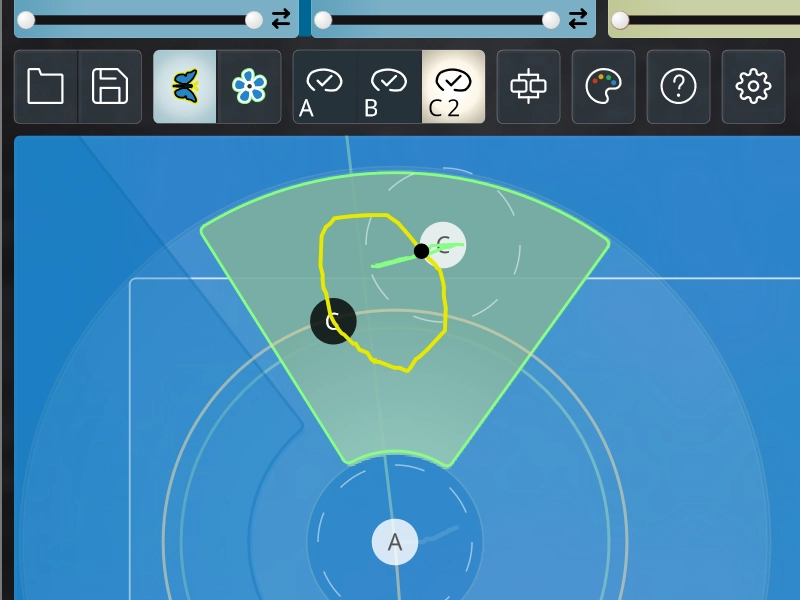
When TouchMod recognizes the pattern, the movement trail turns yellow and begins to repeat. The recorded loop is added to your live finger position. You can keep moving your finger to reposition the entire yellow loop while it plays.
Loop Learning 2
Select the two-loop state after the yellow loop is running. Move your finger in a second repeated pattern.
When TouchMod recognizes the second movement, its trail turns green. The green loop moves the yellow loop as a whole. The two recorded gestures therefore create a layered movement rather than simply controlling two separate parameters.
Stop Loops
To stop the loops in a sector, briefly lift your finger and touch the sector again immediately.
If you lift your finger and leave it away from the pad, the loops continue playing. This allows a recorded movement to continue without keeping your finger on the screen.
Stop all active loops before switching between Butterfly and Flower mode.
Monitor Loops
Enable Show loop monitor when Loop Learning is active in Settings to display information about the recorded movement on the pad. This makes it easier to see the loop duration and amplitude while adjusting the result.
Choose a Color
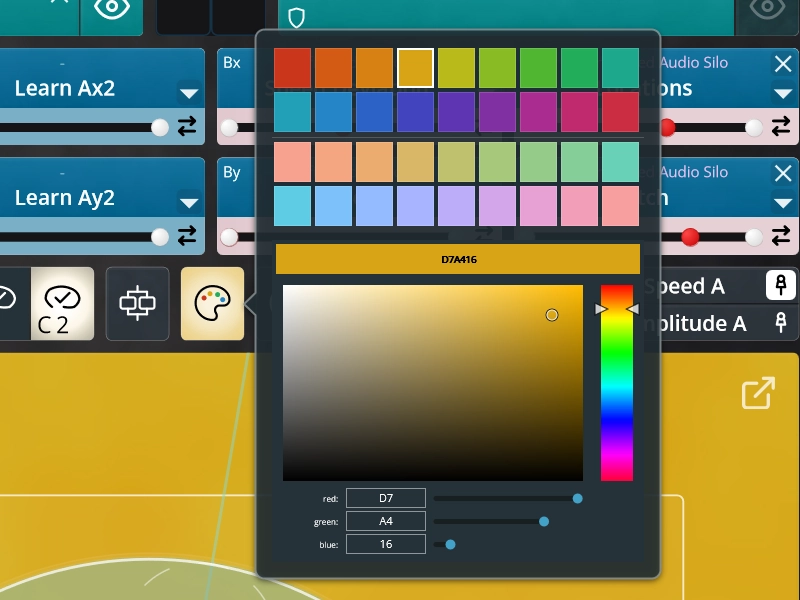
Give each TouchMod instance its own background color. Different colors make instances easier to recognize in your DAW and when switching between them in TouchMod Remote.
Open the color picker and choose one of the available presets, or create a custom color. The selected color applies to the current TouchMod instance.
You can also choose a color simply because it makes the pad easier or more comfortable to view in your working environment.
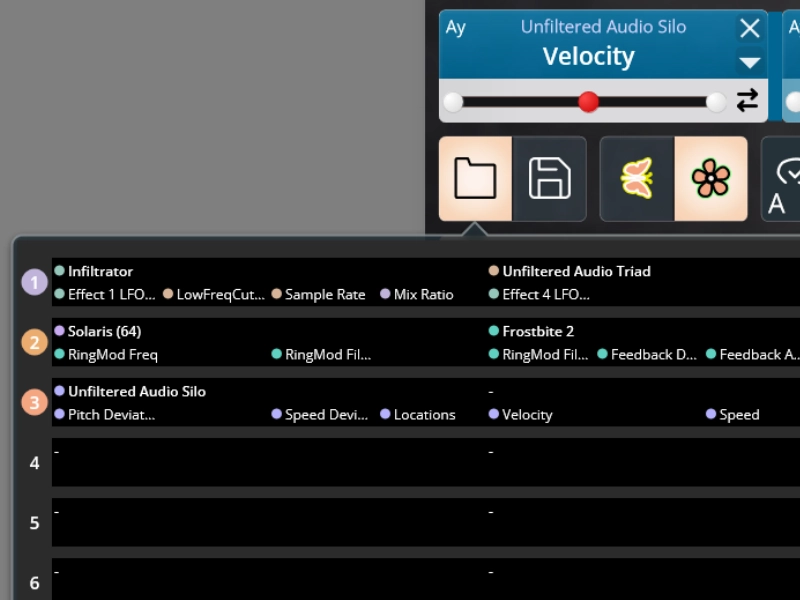
Save and Load Presets
TouchMod provides 20 preset slots. A preset can restore a complete TouchMod setup without requiring you to load the plugins and assign all parameters again.
A preset stores
- The loaded plugins
- The internal state and settings of those plugins
- Assigned parameters
- Minimum and maximum parameter ranges
- Reverse settings
- The background color
- The Mix Ratio
- Dx and Dy assignments for sector D
The selected pad mode and the size and position of the sectors are global settings. They are not stored separately in each preset.
Save a preset
- Open the save list in the toolbar.
- Select one of the 20 preset slots.
- Confirm that you want to replace the current contents of that slot.
Load a preset
- Open the preset browser in the toolbar.
- Select an occupied preset slot.
- Wait while TouchMod loads the saved plugins and restores their states and assignments.
Loading a preset replaces the current TouchMod setup. Save the current setup first when you may want to return to it later.
Control and Assign the Mix Ratio
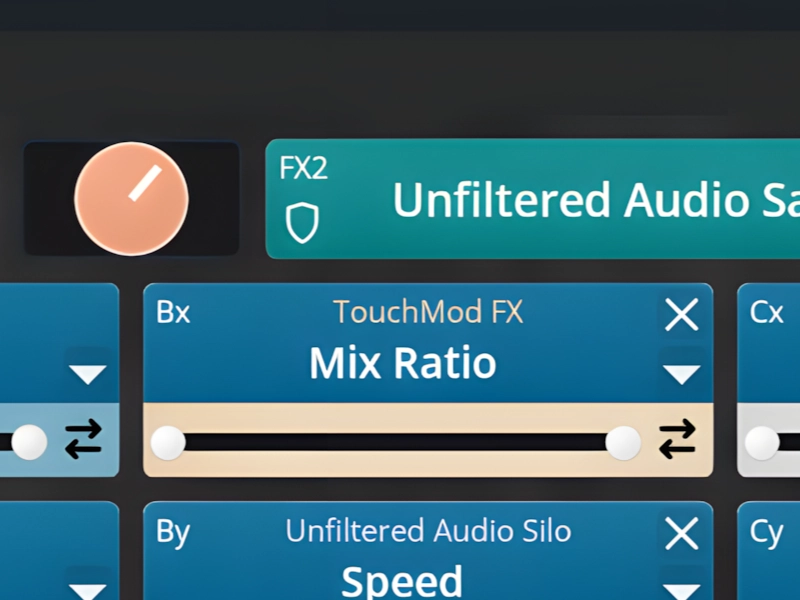
The Mix Ratio control is located between the two plugin selectors. Its function depends on whether you are using TouchMod IN or TouchMod FX.
TouchMod IN
The Mix Ratio sets the balance between the two loaded instruments. Moving it toward one side increases the level of that instrument while reducing the level of the other.
TouchMod FX
The Mix Ratio is available when the two effects use Parallel mode. It sets the balance between the outputs of the two parallel effect paths.
Assign Mix Ratio to the pad
- Activate Learn mode for the touch axis you want to use.
- Move the Mix Ratio control.
- TouchMod assigns Mix Ratio to the selected axis.
You can also select Mix Ratio from the parameter list. Assigning it to the pad makes it possible to change the balance between two instruments or two parallel effects as part of a touch gesture.
Serial and Parallel Modes in TouchMod FX
TouchMod FX can route two loaded effects in series or in parallel. The selected mode determines how audio passes through the effects.
Serial mode
In Serial mode, the audio passes through the first effect and then through the second. This is similar to placing two insert effects one after another in a DAW.
The order matters. A filter placed before a distortion can produce a different result from the same filter placed after it.
Parallel mode
In Parallel mode, the incoming audio is sent through both effects separately. Their outputs are then mixed together. Use Mix Ratio to control the balance between the two processed signals.
Parallel processing can produce comb filtering when the two effects introduce different amounts of latency. The result may be more noticeable with processors that retain much of the original signal. Parallel mode often works more predictably with clearly audible effects such as delays or other treatments that produce distinct output signals.
Parallel routing is also useful for performance. Assign Mix Ratio to the pad to move between two effects or combine them in changing proportions.
Settings
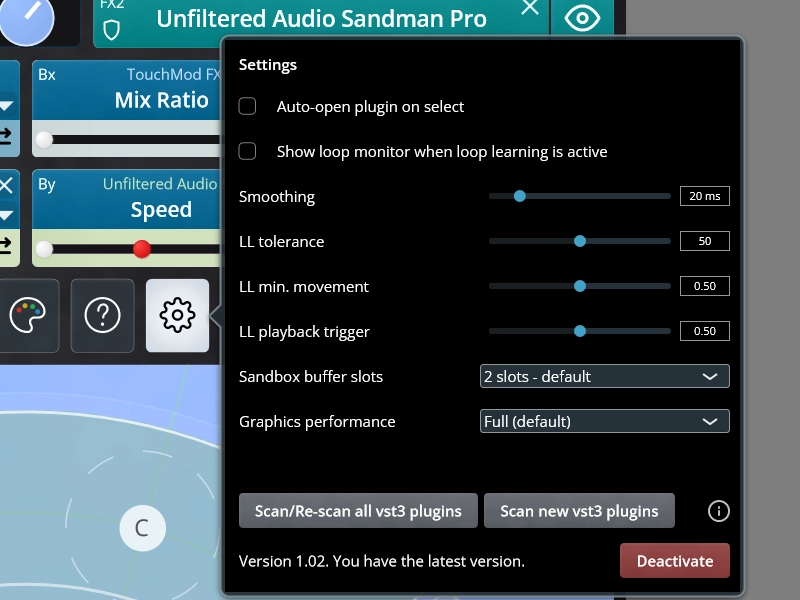
Open Settings with the gear icon. The available options affect plugin loading, Loop Learning, touch response and display performance.
Auto-open plugin on select
Automatically opens a plugin interface after you select and load the plugin. Disable this setting when you prefer to open plugin interfaces manually.
Show loop monitor when Loop Learning is active
Displays information about active loops on the pad, including their duration and amplitude.
Smoothing
Filters very small finger movements and reduces the number of parameter changes sent to the DAW. Lower values respond more quickly. Higher values produce steadier movement. The default value is 5 ms.
Loop Learning settings
The three Loop Learning settings determine how quickly and accurately TouchMod recognizes repeated gestures. The default values work well in most situations. Adjust them when Loop Learning recognizes movements too quickly, takes too long or has difficulty detecting the intended pattern.
Pitch sensitivity
Available only in TouchMod IN. This setting determines how strongly movement in sector D affects pitch. Reduce the value for smaller pitch changes or increase it for a wider response.
Sandbox Buffer Slots
Controls the balance between latency and stability for plugins loaded in Sandbox mode. Use the lowest value at which the plugin operates reliably.
Graphics performance
Reduces visual detail in the pad display to lower processing use. This can help in large DAW projects or on computers with limited graphics or processing capacity.